Advantages of wall mounted air conditioning
Although the wall mounted air conditioner is not the latest product of modern science and technology, it has completed the test of the times. They have
There are many advantages, some of which are listed below.
- The reasonable price is the best advantage of wall mounted air conditioning. They are not out of the reach of most people, which is different from the top high-end air conditioning units.
- They come in a variety of designs, styles and sizes, which means you can get the right equipment based on the size of the room and the available space.
- The relatively new equipment is equipped with inverter technology, which can save energy and greatly reduce electricity charges.
- Air conditioning filters and wireless remote controls are common features of wall mounted air conditioning units, which means that they are very easy to operate and handle.
- It won’t block the windows. Your windows can also play a role, providing fresh air for you when the air conditioner is not working.
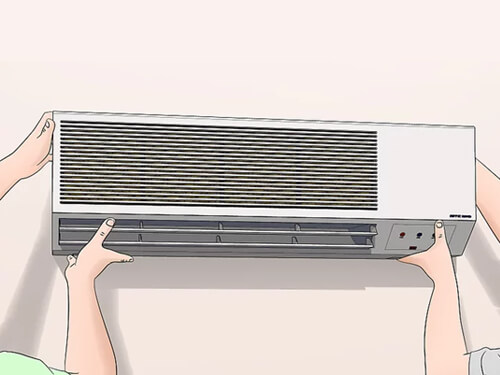
How to install wall mounted air conditioner
The installation method of wall mounted air conditioner is almost similar to that of window type air conditioner. The simple four steps here are some different aspects involved in the installation procedure of the wall mounted air conditioner.
- Please check the instructions to determine if a wooden frame or back panel is required. If necessary, it can be purchased locally, surface treated as required, and directly installed into the wall nail with wood screws.
- If you want to install the through wall device, please find the best installation point on the wall that can cover the whole room symmetrically. The correct location of the mounting points is very important to ensure that the airflow is evenly distributed to different parts of the room and to obtain the best appearance. Be sure to select parts of the wall that do not have internal wiring, piping, and electrical accessories.
- After the positioning point is completed, mark on the wall according to the size of the air conditioning unit. The accepted rule is to measure three times and cut once. If you are not familiar with the work of wallboard, it is suggested that professionals help you to complete it.
- Put your through-wall pipes in a frame because it helps to support. Direct contact of the device with the concrete wall is not desirable because the moisture and current channels in the wall are potential threats. Plywood or wooden frame is very helpful to place the air conditioning unit. Do not force or push any components or parts of the air conditioning unit, as this may cause equipment failure.
Installing the Outdoor Condenser
- Keep outdoor equipment away from any densely populated, dusty or hot areas. Locate the holes you drilled in the internal device mounting plate and place the external device within 50 feet (15 meters) so that pipes and cables can be easily connected. Then select a location with at least 12 inches (30 cm) of space around it to ensure proper operation. If possible, in addition to dust and traffic, choose a shady location away from the wind to keep your unit running at its best. Also make sure that the radio or TV antenna is not within 10 feet (3.0 m) of the outdoor condenser.
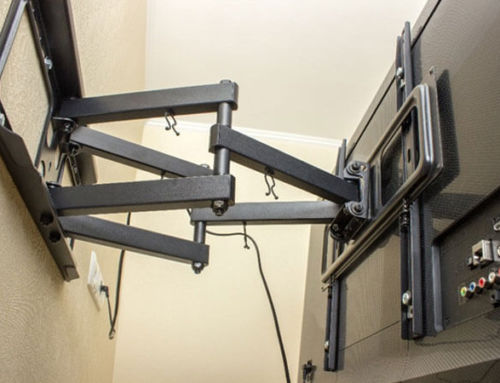
- An air conditioner bracket is installed on the wall to support the external unit of the air conditioner. Do not put the outdoor unit directly on the ground because it is heavy and may move on soil or rock. Fix the bracket on the wall with screws, and measure the flatness with a level
- Fix the outdoor unit on the air conditioner bracket. The rubber pad is placed between the screw and nut to minimize vibration, and then the outdoor condenser is bolted to the bracket
- Check the electrical circuit of outdoor unit. Remove the condenser cover. Refer to the device wiring diagrams in the user manual and make sure that the wiring is identical as the picture. Make any adjustments as needed.
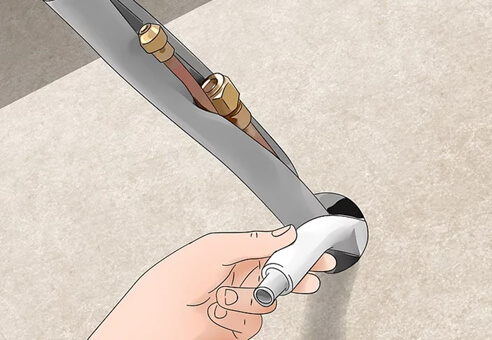
- Connect pipes and cables to outdoor unit. According to the instruction manual, use the flared nut to fix the two copper pipes from the indoor unit to the outdoor unit. Connect the power cord from the indoor unit to the outdoor unit.
Completing the Project
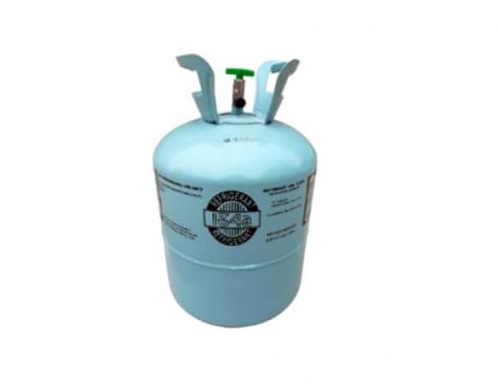
- Remove air and moisture from the refrigerant circuit. Remove the two-way and three-way valve and the cover of the service port, and then connect the vacuum pump hose to the service port. Then turn on the vacuum until an absolute vacuum of 10 mmHg is reached. Then turn off the low pressure knob and finally turn off the vacuum.
- To ensure that pipes and cables do not move around or break, clamp the pipes to the wall. Please use the attached clips to secure them to the exterior wall of your home. Follow the instructions in the manual to ensure that the spacing between the clamps is large enough.

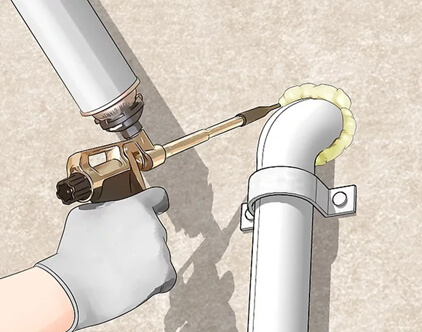
- Use expanded polyurethane foam to seal holes in the wall. Spray the expanded polyurethane foam into the hole you drilled so that the cables and pipes will pass through the walls. Make sure the holes are completely sealed to prevent hot air or insects from passing through.
The rest is to start the air conditioner, which you can start from the indoor unit. It only takes a minute or two to enjoy the cool air conditioning!